How to change where Steam installs your PC games
 Image: Gordon Mah Ung/Rob Schultz
If you’re a PC gamer there’s a good chance a large portion of your game collection is housed in Steam. And while Valve’s desktop game launcher/retail storefront/social network amalgamation is a great tool for organizing games, sometimes its defaults aren’t the best choice for everyone.
Take where your games are automatically installed. By default, Steam drops them into your C drive, but what if you’ve got a larger D partition, or an SSD you want to dedicate to games? No problem. Adding install locations is simple.
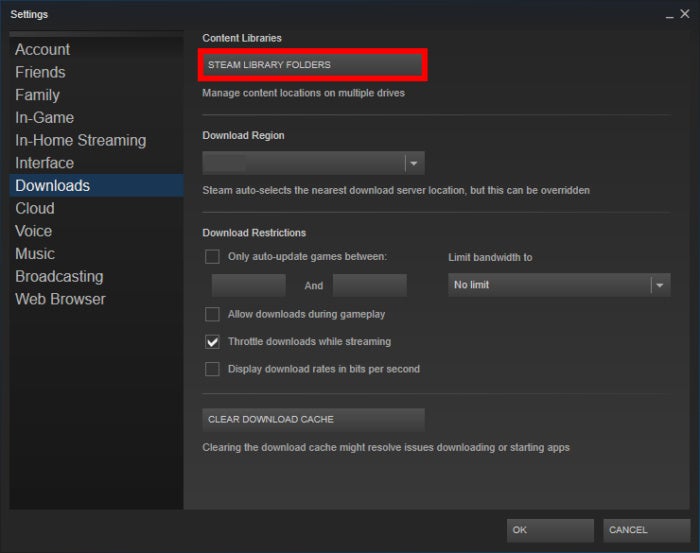
To start, launch Steam and click on Steam > Settings in the menu. You should now see a settings window as pictured below.
 Ian Paul/IDG
Click Downloads in the left-hand navigation column, and at the top of the Downloads section you’ll see the “Content Libraries” heading. Click the Steam Library Folders button just underneath that.
 Ian Paul/IDG
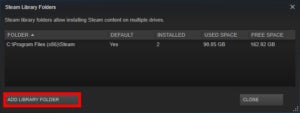
Another window opens displaying the location of your Steam Library Folders. Usually, it’s C:Program Files(x86)Steam. Now click Add Library Folder in the lower left corner.
Yet another window opens displaying your PC’s file system. At the top, there’s a drop-down menu allowing you to switch between different drive labels (C, D, etc.), with the selected drive’s file hierarchy displayed below.
Select a new location for your Steam downloads. The key thing to remember is Steam allows just one Steam library folder per drive label. After choosing the folder location, click Select. Continue this process if you have more than one extra drive that you want to use.
 Ian Paul/IDG
Now you’ve got multiple locations to store your Steam games.
If you want to make a specific drive the default, right-click one of the newly created folder locations in the Steam Library Folders window and select Make Default Folder from the context menu.
 Ian Paul/IDG
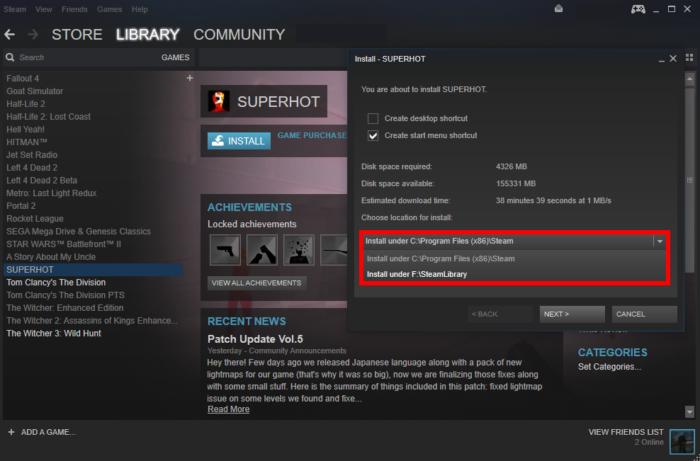
With multiple library folders Steam lets you pick where to install your games on a per-download basis.
The next time you install a game on your PC, your default install location will be automatically chosen. If you need to change that, click the drop-down menu labeled “Choose location for install” in the installation window as pictured here.
Those are the basics of installing Steam games on drives other than C.
Move what’s there
If you want to move a game that’s already installed, right-click on it in the Library section of Steam and select Properties.
Once the properties window opens select the Local Files tab and then click Move Install Folder…. Another window opens listing your possible install locations. Choose the one you want and you’re good to go.
If you want more tips on how to make the most of Steam, we’ve got a ton. Check out PCWorld’s primer on 15 obscure Steam features that can power up your PC gaming.