How to free up storage space automatically with Storage Sense in the Creators Update
 Image: Microsoft
One of the standard ways to free up storage space on a PC is to delete temporary files, empty the recycle bin, and maybe dump the contents of the downloads folder. The pain is you usually have to do all this manually or at least semi-manually with a system utility or third-party tool.
With the Creators Update, Microsoft is making things a little bit easier with a new automated feature called Storage Sense. The name Storage Sense is nothing new. It first made an appearance in Windows Phone 8.1 and was even spotted way back when we were calling Windows 10, Windows 9.
This latest iteration of Storage Sense automatically erases superfluous files when activated. The current version of the feature isn’t as expansive as we’d like to see, but as a first step it will be very helpful.
 Ian Paul/IDG
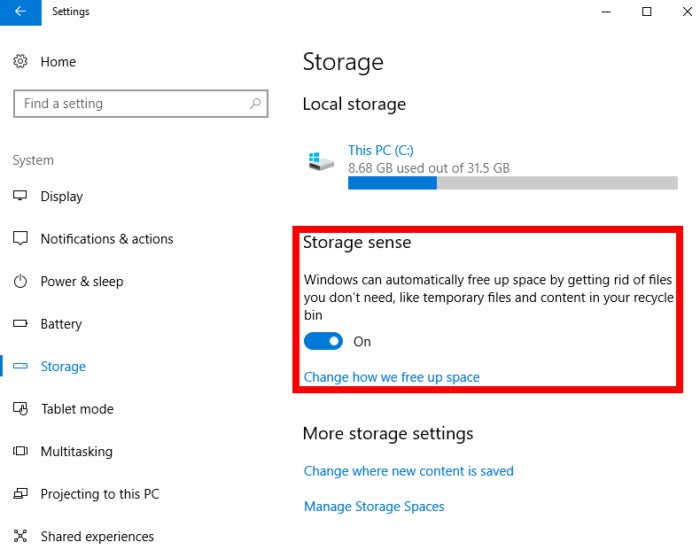
To start, open the Settings app and go to System > Storage. Under the sub-heading Storage sense turn the slider to on. That’s it! Storage Sense is now working. Next, let’s click on the link titled Change how we free up space to review the Storage Sense settings.
 Ian Paul/IDG
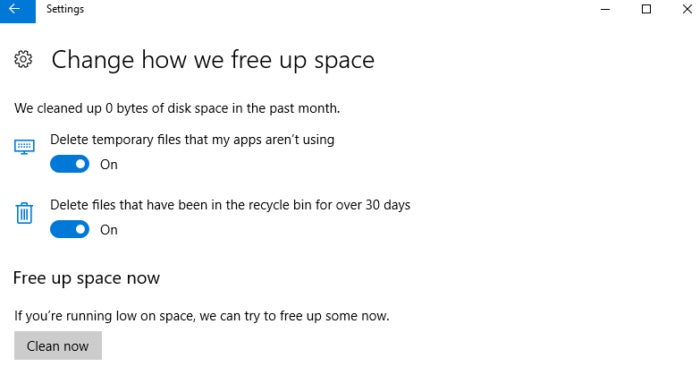
Storage Sense settings in the Creators Update.
As you can see, there aren’t many settings here. If you don’t like either of them just flip the slider to off. The Recycle Bin setting is pretty straightforward: Every 30 days your trash will be emptied. The second setting isn’t very clear, but presumably it will delete the contents of C:temp and perhaps other folders on your system labeled “temp.”
Perhaps over time Storage Sense will get smart enough to manage your downloads folder, too. Regardless, automatically deleting files from these two locations is a big help in freeing up extra disk space.