How to rearrange the quick-actions tiles in the Windows 10 Anniversary Update
 Image: Blair Hanley Frank/IDGNS
Quick actions are a new and very helpful addition that Microsoft added to the operating system in Windows 10. This feature lets you quickly adjust various options such as airplane mode, location settings, screen brightness, and battery saver.
Quick-actions tiles sit inside the Action Center at the very bottom of the panel, and at first glance their arrangement may not seem that customizable. But it is, and Microsoft made that customization even easier with the Anniversary Update.
Quick actions’ display modes
There are two ways to display quick actions in the Action Center. You can either view all of them in a block or click Collapse just above the grid so that only the top four are showing.
Whichever way you prefer to display them, you probably want a little more control over what sits where. Desktops and non-touch laptop users have little need for Tablet mode, for example, but may want to have quick access to Quiet hours.

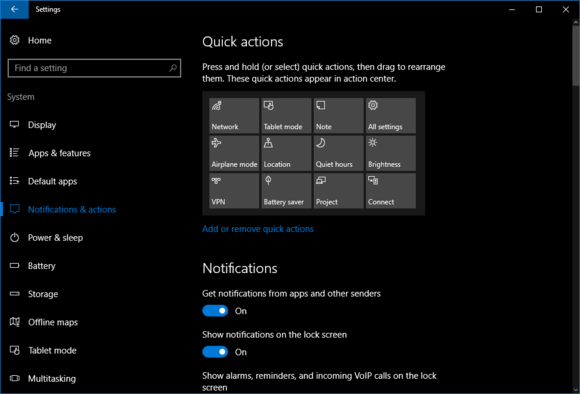
Quick actions in the Anniversary Update’s Settings app.
To adjust quick actions, click on Start > Settings (the cog icon) > System > Notifications & actions. On the main panel of that screen you’ll see a grid of your quick-actions tiles. Each of those tiles are clickable, and you can move them around via drag-and-drop.

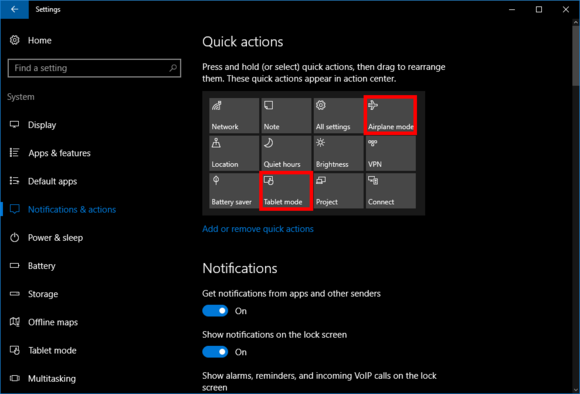
The quick-actions grid now has Airplane mode on the first row after demoting Tablet mode.
Using our previous example, to get rid of Tablet mode click-and-drag it down from the top row. This will automatically push the leftmost tile on the second row to the rightmost position on the top row—in this case, that’s Airplane mode.
Next select Quiet hours and move it up to the Airplane mode position. After that you can arrange the top row icons in any order you like.

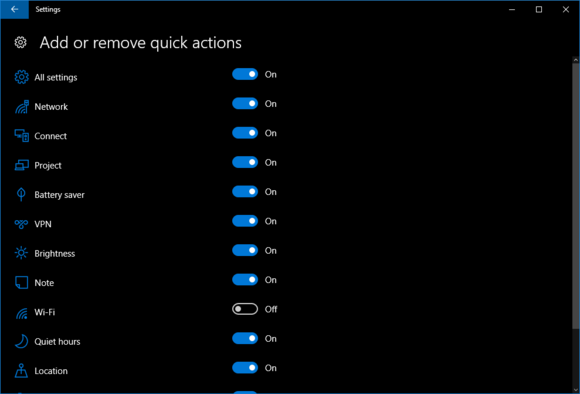
The add or remove quick-actions screen in the Anniversary Update settings app.
If you want to get rid of specific quick actions entirely click the link entitled Add or remove quick actions directly below the quick-actions grid. That will take you to a new screen containing on/off sliders for each quick action.
Once you’ve got quick actions organized the way you like, it will be immediately reflected in the Action Center.