How to use Nearby Sharing in Windows
 Image: PCWorld
Transferring files between PCs can feel laborious, especially when you have only just a few small ones to deal with. A lot of people still hunt for a USB drive to put the documents on—or upload them to the cloud to then download them on the second computer. If you’re a little fancier, you might have the two systems visible to each other on your local network.
Each method has some form of drag—either multiple steps that slow the process during each transfer (USB and cloud), or upfront when setting up the system (local network). But if you have only small files to copy over, there’s a better way built into Windows.
It’s called Nearby Sharing, and not only has it been around for years, but it’s super fast, easy to use, and available to both Windows 10 and 11 PCs.
Further reading: How to format USB sticks and external drives in Windows
How to use Nearby Sharing
Step 1: Enable Nearby Sharing
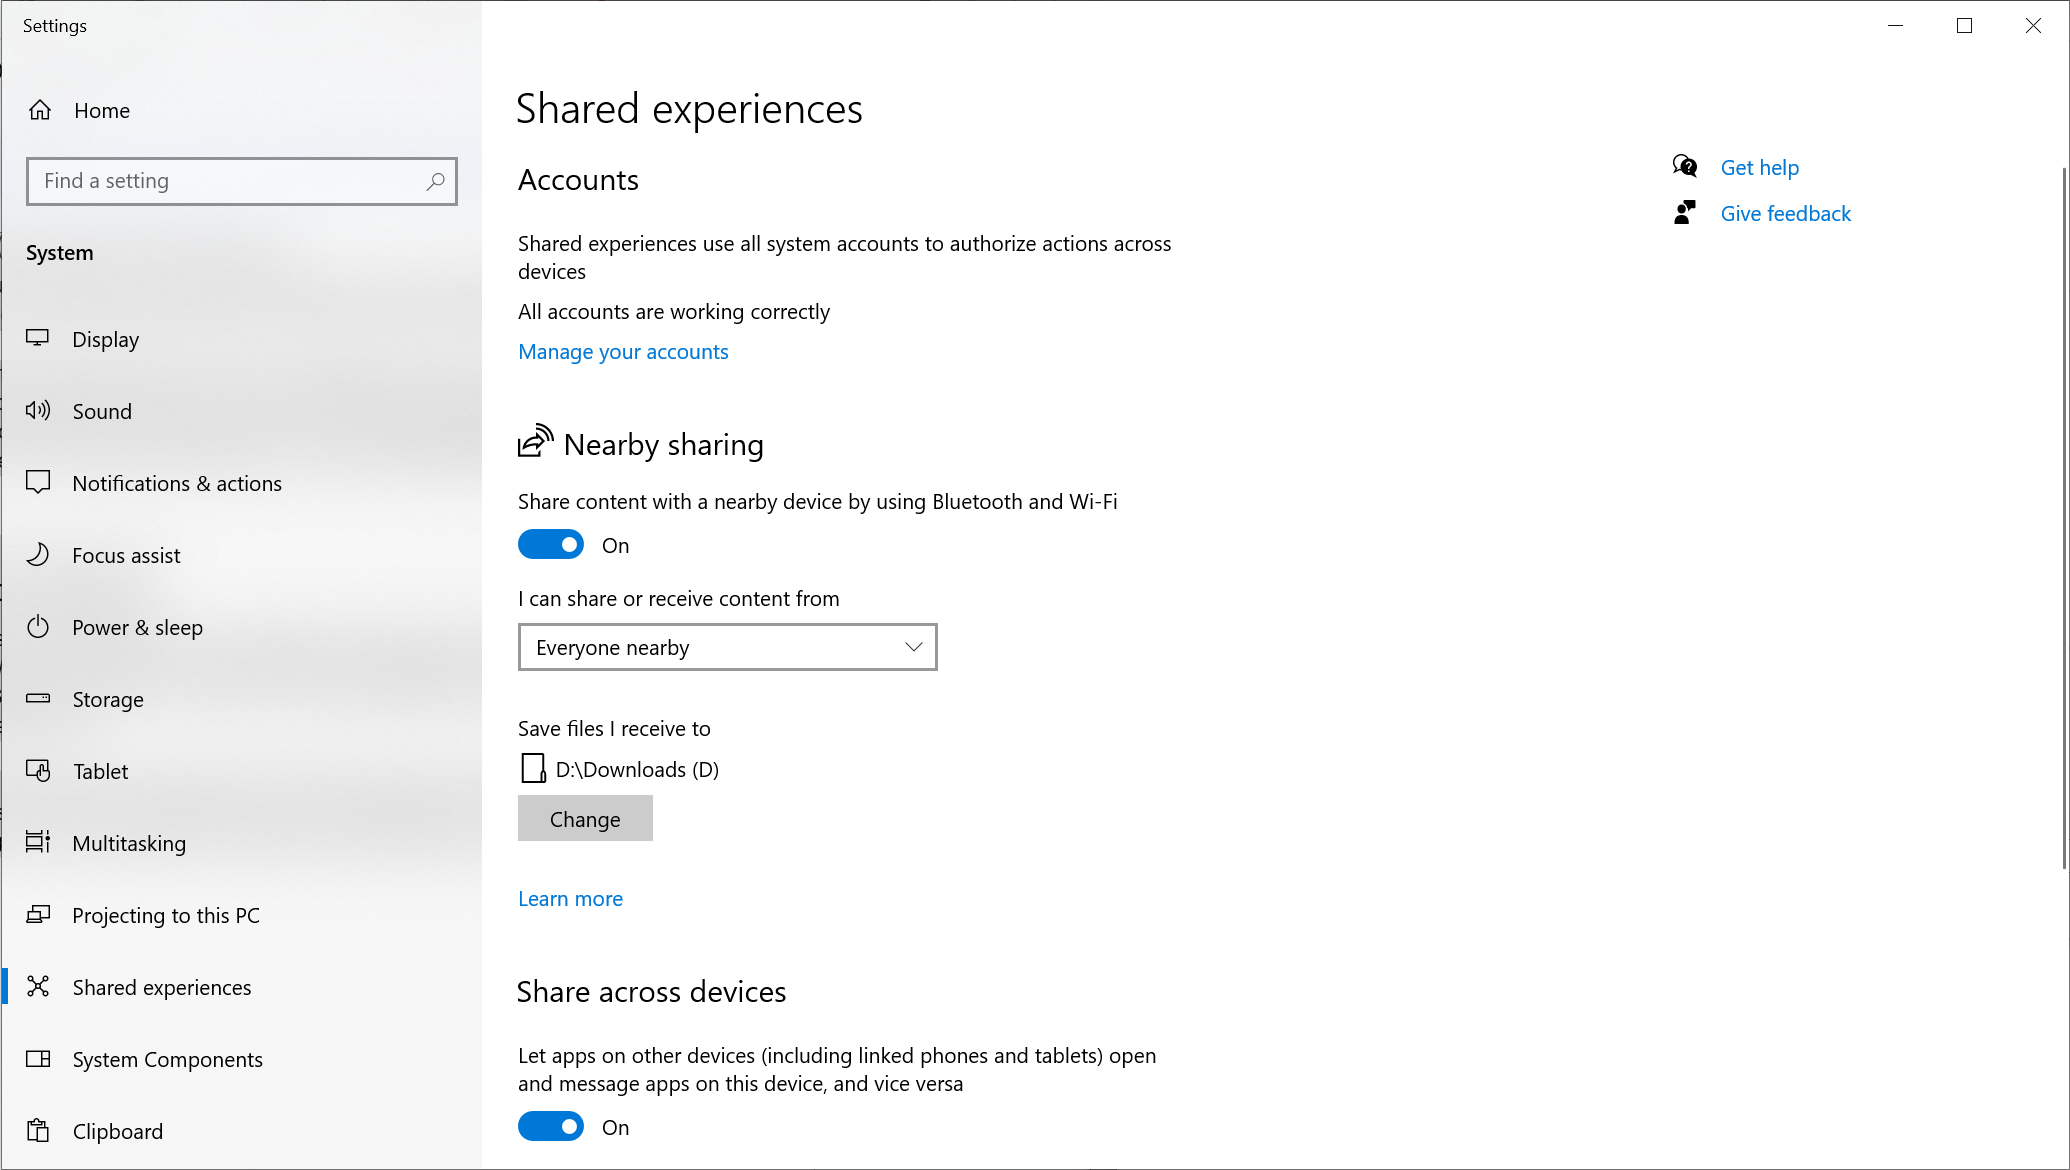
From the taskbar, open search or the Start Menu, then type nearby sharing. Choose Nearby Sharing settings from the search results that appear.
A window will appear for the Shared Experiences settings. Look for Nearby Sharing, then flip on the toggle for Share content with a nearby device using Bluetooth and Wi-Fi.


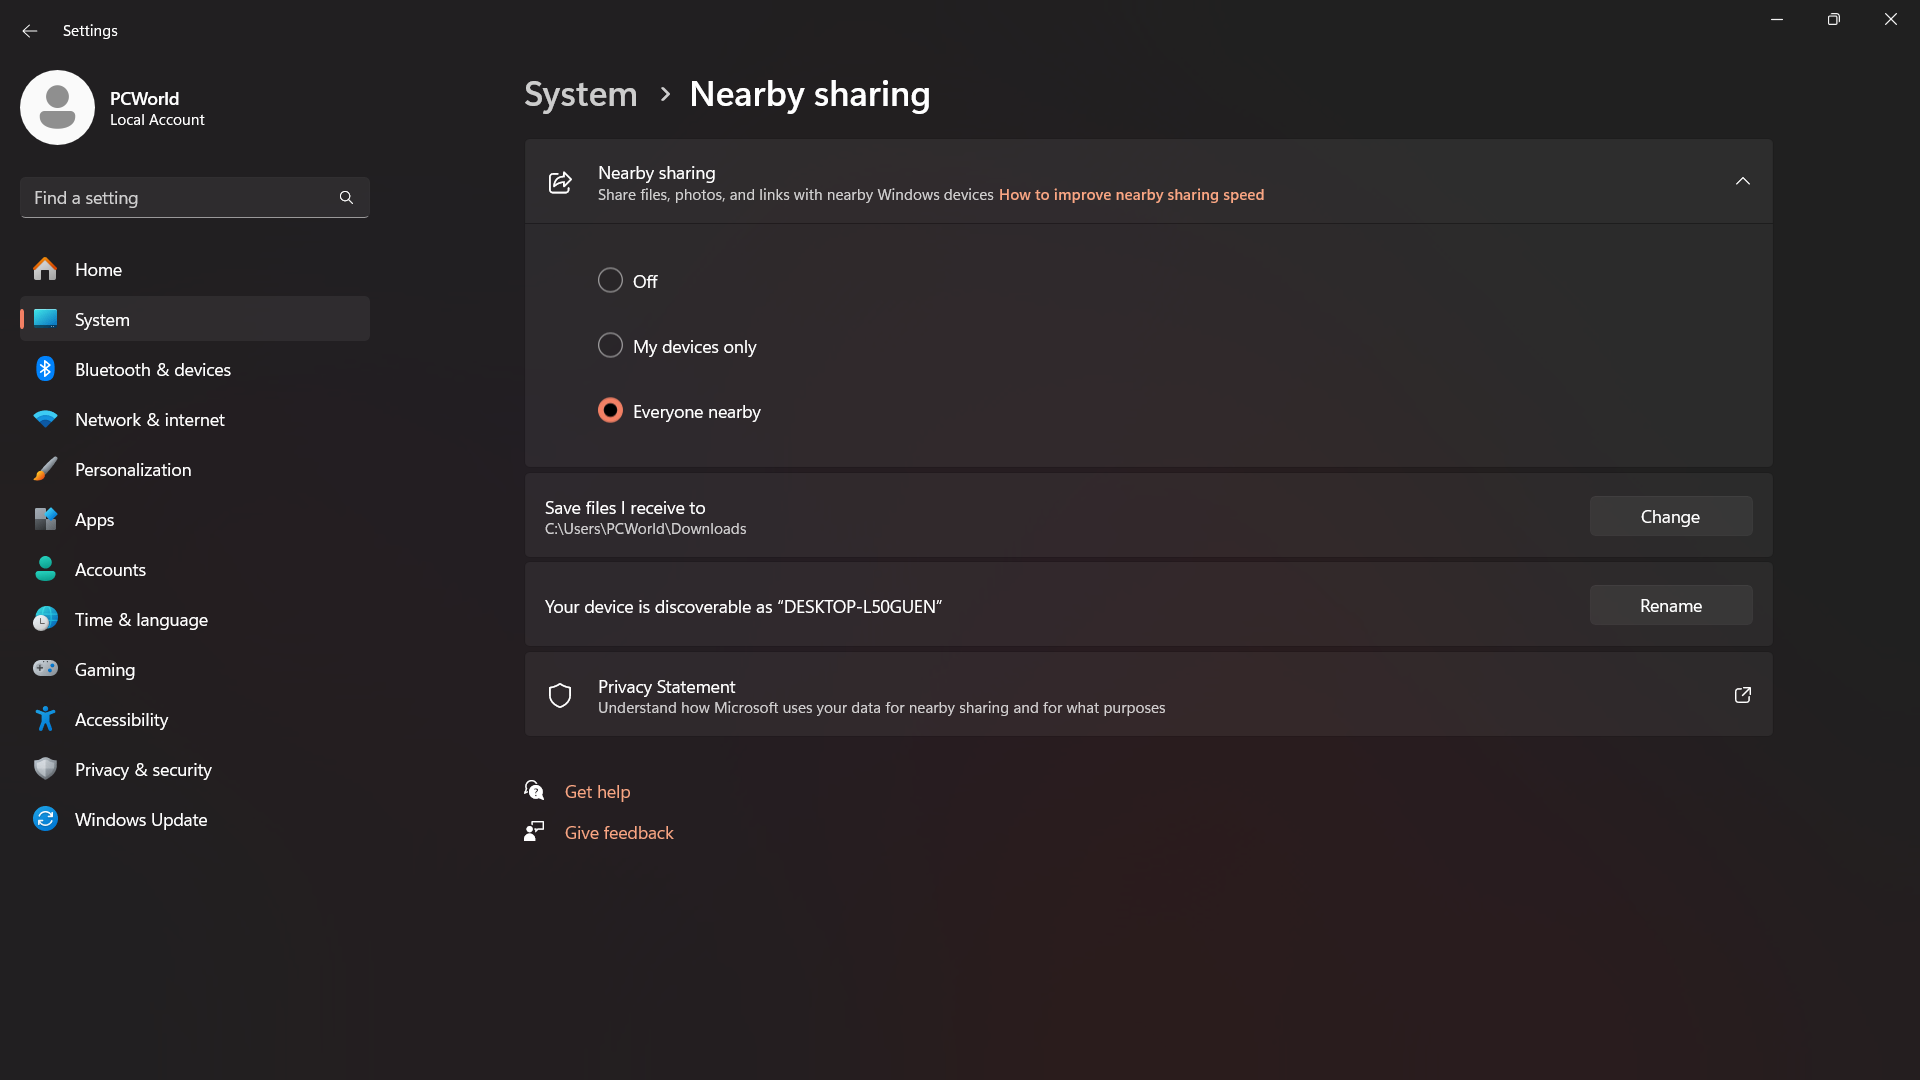
While you’re in the settings, you can choose to stay open to everyone in the area, or limit sharing and receiving to your devices only. You can also change the location for where received files are saved. (Normally, they’ll go to your default downloads folder).
You must enable Nearby Sharing on all PCs that you want to share files between.
Step 2: Share the file(s) between computers
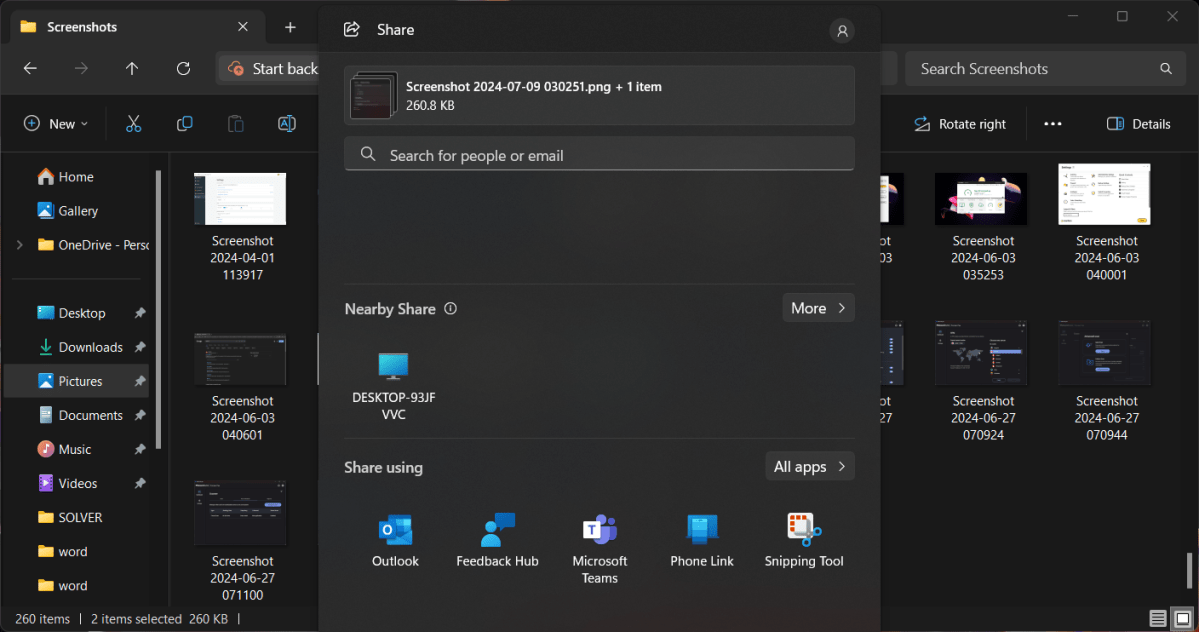
Right-click on the file(s) you want to share, then choose Share from the context menu. If you’re in a File Explorer window, you can also choose Share > Share from the ribbon menu.
You should see the name of the receiving PC in the list of available devices. Click on it to send a sharing request, then accept the request via your Windows notifications. (If you don’t see the pop up, check the Notifications Center on the taskbar). You can transfer files between Windows 10 and 11 PCs freely—there are no operating system version restrictions between them.

PCWorld
PCWorld
PCWorld
When to use Nearby Sharing
Nearby Sharing isn’t always the fastest method for transferring files—when the connection goes over Bluetooth instead of Wi-Fi, it becomes much slower than uploading to the cloud and downloading, or using a USB drive. However, that lag isn’t as noticeable for small files (like smartphone photos or screenshots).
Using Nearby Sharing also keeps transferred files more private, since they’ll only be available locally on each PC. And in some cases, it can be less work, especially if you were uploading images to Slack and having to do it in batches of 10 each time. (Cough). You just fire and forget.
Author: Alaina Yee, Senior Editor, PCWorld

A 14-year veteran of technology and video games journalism, Alaina Yee covers a variety of topics for PCWorld. Since joining the team in 2016, she’s written about CPUs, Windows, PC building, Chrome, Raspberry Pi, and much more—while also serving as PCWorld’s resident bargain hunter (#slickdeals). Currently her focus is on security, helping people understand how best to protect themselves online. Her work has previously appeared in PC Gamer, IGN, Maximum PC, and Official Xbox Magazine.
Recent stories by Alaina Yee:
Why are tech companies so willfully bad at privacy?Windows 11’s most-hyped new AI feature could be a privacy nightmareMicrosoft battens security hatches on Windows admin accounts